How to Refinish a Dining Table: Step by Step
Your dining room table does more than hold plates and silverware. It facilitates insightful (or silly) conversations, contains priceless family memories, and serves as the functional centerpiece of your home. It also endures its fair share of scuffs and spills.
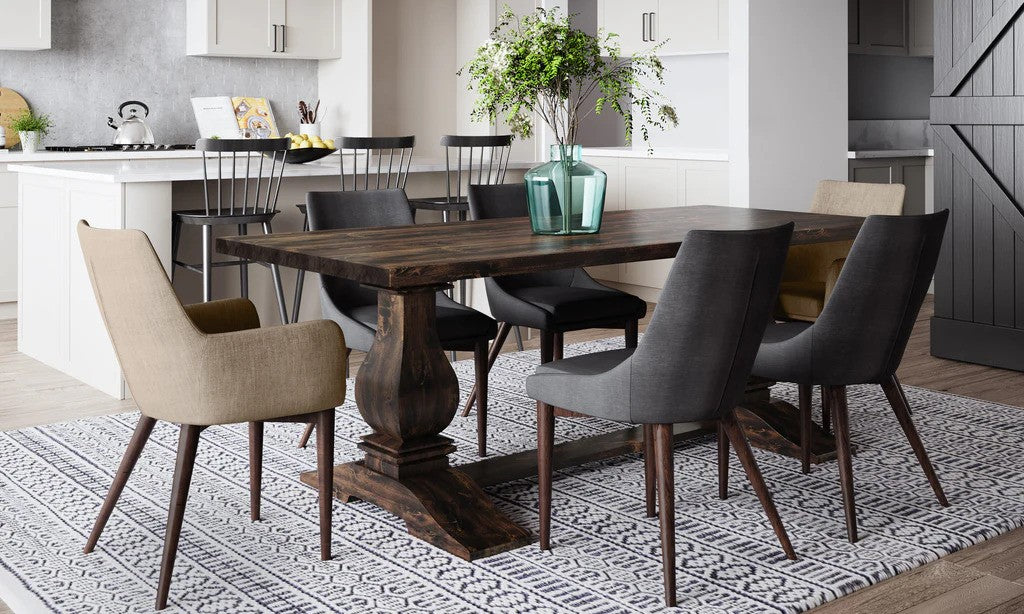
If your current wood dining table is worse for wear, or you need to bring your recent thrift store steal into this decade, give it a facelift by refinishing it.
You don’t have to be a master carpenter or seasoned DIY specialist to learn how to refinish a dining table. Buff out those blemishes, update the stain, and make its surface shine by following our simple step-by-step guide.
Step 1: Assess and Prepare Your Dining Table
If your dining table’s old finish is past its prime, you might be eager to jump right in with the sandpaper and stains. But before you go to town, it’s important to complete a few other checklist items.
To refinish a table, first, identify the type of wood your table is made from, if you don’t know already. There are many different types of wood for furniture, and the wood’s properties will affect how it responds to the refinishing process. Important factors include:
- Hardness – This will inform your wood sanding method. Dense hardwoods such as oak and walnut require coarse sanding, while softwoods such as pine and cedar need a finer touch.1
- Appearance – When it’s time to select a new stain, you’ll need to consider how the stain and wood will interact. Since stains aren’t fully opaque, some of the wood’s natural color and grain pattern will shine through, creating a slight undertone and texture.2
Next, inspect your table for any existing damage, such as scratches, nicks, or gouges. These are the areas that will need more attention when it’s time to strip and sand.
Finally, assemble all your essential refinishing materials. You’ll need:
- Cleaning supplies
- Chemical finish stripper
- Sandpaper and sanding block
- Your preferred stain
- Varnish or other finishers
Step 2: Clean the Table
Think of your dining table as a canvas: you need a blank, clean surface to create your new masterpiece. Dust, dirt, and oils can disrupt the refinishing process, preventing you from achieving your dining table vision.
To that end, make sure to thoroughly clean the entire table’s surface as you would after any big spill. This sets you up for the heavier-duty job of stripping and sanding.
Step 3: Strip the Old Finish
Sometimes, you have to strip away the old to usher in the new. The same applies when you refinish a table.
There are two ways you can strip old finish:
- Using a chemical stripper
- Sanding
Sanding scrapes off existing finishes, but can potentially scrape away wood along with it. Chemical strippers only interact with the finish, ensuring the surface underneath stays intact.3
You may also prefer chemical stripping if you want to do as little sanding as possible. This method still requires some elbow grease, though. Here’s how to do it3:
- Choose a chemical stripper that corresponds to the finish you’re stripping. Any solvent with methylene chloride works well on stubborn paints and varnishes, while wood refinishers made from alcohol or acetone will take care of shellacs and lacquers.
- Apply a generous coat of stripper with a large brush, then wait 10 to 15 minutes for it to loosen the finish.
- Use a scraping tool to strip off the loosened finish. For curved or hard-to-reach sections, scrape the finish with an abrasive material like steel wool or a sharpened dowel.
- Repeat these steps until you reveal the natural wood underneath. You may also want to scrub the wood with another round of alcohol or lacquer thinner to remove any extra wax or oil buildup.
Chemical strippers make scrubbing away old finishes a breeze—but to avoid inhaling fumes, you’ll need a breeze of your own. Always work outside or in a well-ventilated area, and wear protective gloves, eye goggles, and a face mask to keep harmful particles out.
Step 4: Sand the Wood
Many people dread the sanding stage when refinishing wood furniture. We get it—sanding is a hardcore (and dusty) upper-body workout. But when done correctly, it can smooth the rough edges of even the most well-loved table.
To sand efficiently, you’ll need sandpaper with the right amount of grit. Here’s the nitty-gritty on sandpaper grits4:
- Coarse (80-100 grit) – For wood with some major battle scars, start with lower grit sandpapers. They’ll score the surface with larger scratches of their own, so you’ll want to follow up with higher-grit papers.
- Medium (120-150 grit) – Medium grits will leave barely visible scratches on the wood’s surface, perfect for absorbing stain.
- Fine (180-220 grit) – Often, you can stop sanding after using 150 grit, but if you want a buttery-soft surface with just a slight grip for varnish, you can finish with fine grit paper.
It’s important to note that sanding is not a one-and-done process. You may not see any abrasions in the wood after a single sweep, but when you apply your stain, they’ll appear like an unpleasant magic trick. For the best results, sand your table three or four times, using progressively finer grits to achieve a smooth, scratch-free surface.4<
For superior sanding, follow these tips4,5:
- Always sand with the grain – Woodworkers will all tell you the same thing: sanding with the wood grain produces the finest finish.
- Work slowly and steadily – The goal of sanding is to create the most even surface possible. Accomplish this by sanding methodically, working the whole surface equally. Oversanding an area to remove larger scratches will only cause uneven dips in the wood. Learn more about how to fix scratches on a wood table in our guide.
- Use sanding blocks or sanding pads – Not all surfaces on your dining table will be flat. Fortunately, you can sand carved edges, rounded legs, and tight corners with malleable sanding blocks or pads. Pool noodles, cork scraps, and even pencil erasers can also be fashioned into custom sanding tools.
When sanding, use the same level of caution as you did when stripping the old finish. Sandpaper itself isn’t toxic, but the wood dust it creates can irritate your eyes and lungs if they aren’t protected.
Step 5: Stain the Table
Your wooden dining table has likely endured plenty of messes, from wine spills to hot glue gun mishaps. There is one stain we can get behind, though.
Wood stains consist of two main substances: a solvent and a pigment. A stain’s solvent impacts the application, drying, and layering processes. The most common ones include6:
- Oil-based stains – Thick and slow-drying for a rich color and even finish
- Water-based stains – Thinner and quick-drying, but more environmentally friendly and easier to clean
- Gel-based stains – Even thicker than oil-based stains for stroke-free application; can be rubbed in harder or softer to control the deepness of the color
Here’s how to apply a stain for an even coat and rich color2,6:
- Stir the stain in its container to recombine the solvent and pigment.
- Apply an even coat of stain over the entire surface with a cloth or brush (or whatever tool the stain instructions suggest). Use uniform motions, and always go with the wood grain.
- Let the coat dry completely. Brushing between layers can leave behind visible, unattractive streaks. Again, defer to the stain’s instructions for drying times.
- Repeat until you reach the depth of color you’d like.
What’s most fun about wood stains is that you get to choose from almost any color you can imagine (unlike unexpected food or drink stains — learn how to remove water stains from a wood table top in our blog). Remember to keep the wood’s natural color in mind, as it will influence the final result.
Step 6: Seal and Finish
Stains add stunning color to your table and enhance the natural beauty of the wood. But in order to cement your stain job, you have to seal it in with a finish.
There are several types of quality finishes to choose from7:
- Shellac
- Lacquer
- Polyurethane
- Varnish
- Wood wax
How durable is polyurethane? Polyurethane is considered the most durable indoor furniture finish. It protects against scratches and water damage,7 which is why we use it to finish our own pieces.
The application process will depend on the type of finish you use. Here’s how to apply polyurethane8:
- Brush with uniform, overlapping strokes, going with the grain once more. Only use enough polyurethane to evenly coat the wood’s surface.
- Wait at least a day for the first coat to dry.
- Gently sand the dried surface with a wet piece of sandpaper to remove imperfections. Use a very fine grit (400 grit) and sand with circular motions for the best results. Wipe away the dust with a cloth.
- Apply a second coat of polyurethane the same way you did the first.
There you have it—your refinish project is finished!
Maintaining Your Newly Refinished Table
Refinishing a dining table certainly pays off, but it’s a lot of hard work. Make sure it lasts by properly caring for it:
- Clean up spills and other messes soon after they happen.
- Use coasters, placemats, and trivets, especially under very hot objects. If you can hold the tableware comfortably with your bare hand, your refinished table should be fine, but it’s better to be safe than sorry, especially if you’re DIYing.
- Keep your table out of direct sunlight to avoid fading.

Not Satisfied? Explore Wood Tables by James+James
Refinishing can add vitality and longevity to a dining table’s surface. But some tables need a more intense makeover—or a complete replacement.
If you need a dining table that welcomes and withstands all of life’s beautiful messes, choose James+James.
Our furniture, like our American-made dining tables, is handcrafted from durable solid hardwood and finished with water-resistant and scratch-minimizing polyurethane. A dining table from us can handle dinner parties and a family arts and crafts session.
Browse our wide selection of timeless and long-lasting premade pieces now. Or, explore our custom options to design the dining table of your dreams.
Sources:
- The Spruce. Hardwood vs. Softwood: Everything You Need to Know for Your Next Project. https://www.thespruce.com/hardwood-vs-softwood-8347979
- Wood Finishes Direct. How to Stain Wood – A Step by Step Guide. https://www.wood-finishes-direct.com/blog/how-to-stain-wood/
- Fine Woodworking. Removing an Old Finish. https://finewoodworking.com/FWNPDFfree/011093084.pdf
- Wood Magazine. Sanding Basics. https://www.woodmagazine.com/tool-reviews/sanders/sanding-basics
- Wood Magazine. Keys to Successful Hand-Sanding. https://www.woodmagazine.com/wood-supplies/sanding-abrasives/keys-to-successful-hand-sanding
- Family Handyman. What to Know About Wood Stains and Finishes. https://www.familyhandyman.com/article/types-of-wood-stains-finishes/
- The Spruce. Types of Wood Finish and How to Choose. https://www.thespruce.com/types-of-wood-finishes-5546952
- Family Handyman. How to Apply Polyurethane. https://www.familyhandyman.com/project/how-to-apply-polyurethane/


0 comments
Add a comment